Sunday, July 08, 2012
Russian Black Bread
It's been about three months since I've posted on this blog, and several of you were nice enough to check in with me to ask if I was feeling all right. In my defense, I went on a 3-week trip to Russia, Estonia, and Finland in May and June. Then I went on a road trip to South Dakota (Mount Rushmore! Herds of buffalo! The Corn Palace!) for a week. But I've been back for a while, and I figured I'd better post something before my excuses started to molder.
Because I ate so much good black bread in Russia and the other nearby countries, I wanted to try my hand at making some. I assumed that the black color would come from pumpernickel flour. But, at least in this recipe, from Smitten Kitchen, it comes from molasses, chocolate, and espresso powder. I have no idea how authentic this bread is. Smitten says her husband is Russian, and her mother-in-law is a good Russian cook, but this recipe is from The Bread Bible, by Beth Hunsberger. How can there be two cookbooks called The Bread Bible? Doesn't the name of the cookbook get copyrighted? I'm going to research that one day, but not today.
Authentic or not, Russian or not, this recipe makes a fine bread. It's not hard to make, but it does have the drawback of calling for about 32 ingredients. I exaggerate, of course, but not by much. And, unless you bake a lot of bread, there are ingredients you're not likely to have on hand. White and whole wheat flour, yes, but rye flour? Bran? Espresso powder? Maybe not. I actually had everything in my pantry or freezer except for shallots. My advice is not to omit the shallots--although I don't recall eating any bread in Russia that had that onion-y taste, I liked it a lot. By the way, although you could taste the shallots, the chocolate and espresso weren't obvious flavors in the finished product, although I think they added some depth.
Hmmm. It looks a little nasty, doesn't it? I mixed it using the flat beater, and then switched to the dough hook, but it's a heavy dough, and it required a little hand kneading. (This is one of those breads that could be made pretty easily without a stand mixer, and it would be good exercise for your upper arms, for sure!
The recipe makes two good-sized loaves. I made one in a loaf pan, and the other into a boule.
What did I do with these two loaves? They were the solid base for a Russian dinner party. I cut the loaf in thin slices and used them as the base for some
Russian appetizers: spread thickly with unsalted butter and sprinkled with caviar, onions, and hard-boiled eggs (yum); spread thickly with cream cheese and chives and topped with smoked salmon (yum); and topped with pickled herring (blech). We had shots of vodka straight from the freezer, of course. Hа здоровье!!
The other loaf went along with dinner: chicken shashliki with traditional tomato sauce, beet salad with yogurt and dill dressing, and butter-steamed potatoes (also known as molodaya kartoshka v masle). For dessert, I made strawberries Romanoff (not truly Russian, but a good dessert anyway.)
I also want to try Estonian black bread and Finnish black bread. But maybe I'll wait a bit for those. Hopefully it won't be another three months.
Saturday, April 07, 2012
Oatmeal Buttermilk Bread
I saw a handsome loaf of oatmeal bread at Sun Street Breads, one of the best bakeries in Minnneapolis. I almost bought a loaf, and then I remembered that I was supposed to be a bread baker, and I hadn't baked a loaf of bread in a long time. I had some buttermilk, left over from another project, in the refrigerator, so I decided it would be an oatmeal buttermilk bread.
A nice thing about baking yeast bread with buttermilk is that you can just substitute it ounce-for-ounce for milk, and you'll get a similar, but slightly tangier, result. (Things are trickier when you try to substitute it for milk in a quick bread--you have to decrease the baking powder and increase (or add) baking soda).
As I was making this bread, and marveling over how the oatmeal changed from big rough flakes to a porridge-like consistency after just a brief soak in water, I wondered why I'd never made oatmeal before. But the search function on my blog showed me that I had--twice, in fact.
The first time I made it, back in 2007, I was inspired by Rose's mention of Jeffrey Hamelman's oatmeal bread, which she made for her father. I couldn't find Hamelman's recipe, so I made a different version, which gave me no end of trouble. I ended up with a sadly misshapen loaf, and complained bitterly about the ends, which looked like, I said, giant belly buttons. Then, a few months later, I made a different version that Rose had on her blog--one with honey and flaxseed. I was pleased with that one.
Now, five years later, I own the Jeffrey Hamelman book, Bread, that has the recipe Rose used for her father's birthday, and which inspired me in the first place. The up side of having an increasingly faulty memory is that so many things come as surprises! If I'd remembered this whole series of events when I first got Hamelman's book, I probably would have just made the oatmeal bread then (without buttermilk, since his recipe calls for sweet milk), and I wouldn't have been so delighted to find out that I'd finally made the bread I was trying to make way back when. Now I'm not only happy with the bread, I'm happy to discover that it's apparently been on my to-do list for five years.
I can see why Rose's father liked this bread so much. It's very likeable. Excellent as a sandwich bread, it really shines as toast. So much so that my groan when my alarm clock goes off at 6:00 soon turned to a smile, and I jumped out of bed: toast for breakfast! Yay!
Buttermilk Oatmeal Bread
adapted from Bread, by Jeffrey Hamelman.
1 lb, 10 oz. bread flour
6 oz. whole-wheat flour
5.3 oz. rolled oats
2 cups water
1 cup buttermilk
2.4 oz. (3T) honey
2.4 oz. (5 1/2 T)canola oil
.7 oz (3 1/2 tsp.) salt
.18 oz. (1 1/2 tsp) instant dry yeast
Place the oats in a mixing bowl. Add the water, and let stand for 15 or 20 minutes to soften. Add all the remaining ingredients to the bowl. Using a dough hook, mix on low speed for 3 minutes until thoroughly mixed. Turn the mixer to medium-low and mix for another 3 to 5 minutes.
Let rise for one hour. Fold the dough once during this rising, using a letter-style fold.
Divide the dough in half and shape into loaf pans. Brush the tops of the bread lightly with water, and press oatmeal gently onto the tops of the loaves. Cover the loaves, and let rise for another 1 to 1 1/2 hours.
Preheat oven to 450 degrees, using a pizza stone if possible, and preheating the stone as well. Put 1/2 cup ice cubes on a preheated tray or pan in the oven, and put the loaves on the stone (or on the oven rack). After 15 minutes, lower the temperature to 400 degrees. Bake 30 to 40 minutes.
Monday, February 20, 2012
Za'atar Flatbread
I wasn't going to blog about this bread because it's embarrassingly easy to make, as long as you have the za'atar (or zatar--or, for that matter, zaatar, zatr, zattr, zahatar, zaktar or satar).
If you have the spice mixture, however you want to spell it, you can make a close approximation of the bread just by buying pita or other flatbread, brushing it with olive oil, sprinkling the za'atar mixture on top, and baking it for 5 minutes or so. I got my mixture at Penzey's, but it's also available at a number of on-line sources. (When I was at our local Penzey's store, I remembered that I wanted this spice, but I couldn't remember what it was called. I asked if they had any Qatar. The nice man at Penazey's didn't say, "You moron, that's a country, not a spice." Instead, he kindly led me to the za'atar and said, "I think this is what you want." The Penzey's mixture has thyme, sumac, sesame seeds, and salt, but other mixtures may also contain oregano, mint, marjoram, or savory. There are many recipes available via the internet, the source of all knowledge.
I simply used the master recipe in Artisan Bread in Five Minutes a Day, by Jeff Hertzberg and Zoe Francois. I halved the recipe, and used about two-thirds of that to make the flatbread. (The other third is being made today into a mini-boule that will be sliced and used to top some onion soup).
The dough is spread out flat, punched with your fingers, and doused with olive oil. Then you liberally sprinkle on the za'atar mixture and a little more salt (there is already some salt in the za'atar, so you want to be careful not to overdo the added salt).
I baked it for about 25 minutes at 425 in a convection oven, cut it into small wedges, and served it with hummus. Now za'atar is my new favorite taste sensation. It's salty, a little sour, herbal, and nutty. Artisan Bread in Five suggests using it in a kabob marinade or in fattoush--both sound great for summer cooking. Alas, summer is not yet here, but I hope the zatar will keep for a few more months.
Tuesday, February 07, 2012
Cranberry Pecan Boule - and a Surprise Present
I made strict rules this past Christmas about buying presents for me. Not because I don't think I deserve them--no, not at all. It was because I had already picked out a whole boatload of things that I wanted. (To be perfectly honest, I'd already bought them and just gave them to Jim to wrap). But there's a limit to how many geegaws you can buy for yourself, and I had exceeded the limit. So I told Jim, no more! But three days before Christmas, a large box appeared in the mail, addressed to me. I opened it - it was addressed to me, after all, and found this:
It's a Brød &Taylor Folding Proofer. "Jim," I said, "you were not supposed to buy me anything else." He claimed he didn't. I didn't believe him. He swore that he didn't. I asked him who else would buy me a bread proofer. "Maybe it was Rose," he guessed. "That's crazy," I told him. But then I remembered that I had read something on Rose's blog about a proofer. So I called Woody and asked him if he'd ever heard of a bread proofer. "Oh, did you get yours? I just got mine too," he said cheerfully. Mystery solved. Thanks, Rose. And thanks, Brød &Taylor, too.
The proofer came with two recipes: country wheat sandwich bread and cranberry pecan boule. I voted for cranberry pecan. Since nobody else voted, I won. It starts with a poolish starter, which sits in the proofer for 4 hours at 74 degrees. I loved it that it was 74, and not 75.
Usually a poolish sits in my chilly kitchen overnight. In the summer, it ferments for a few hours in my warm kitchen and then overnight in the refrigerator. It's all very casual, which I like. But I also like knowing that I can end up with a bubbly poolish in just 4 hours at 74 degrees. If I get very brave sometime, I may try it at 75, or even 76 if I'm feeling very devil-may-care.
It's a very stiff dough. I kneaded it for almost 10 minutes in my new KitchenAid and had visions of watching another mixer go kaput. But it chugged along (it is still under warranty, so I don't really expect it to go under until 24 hours after the warranty expires).
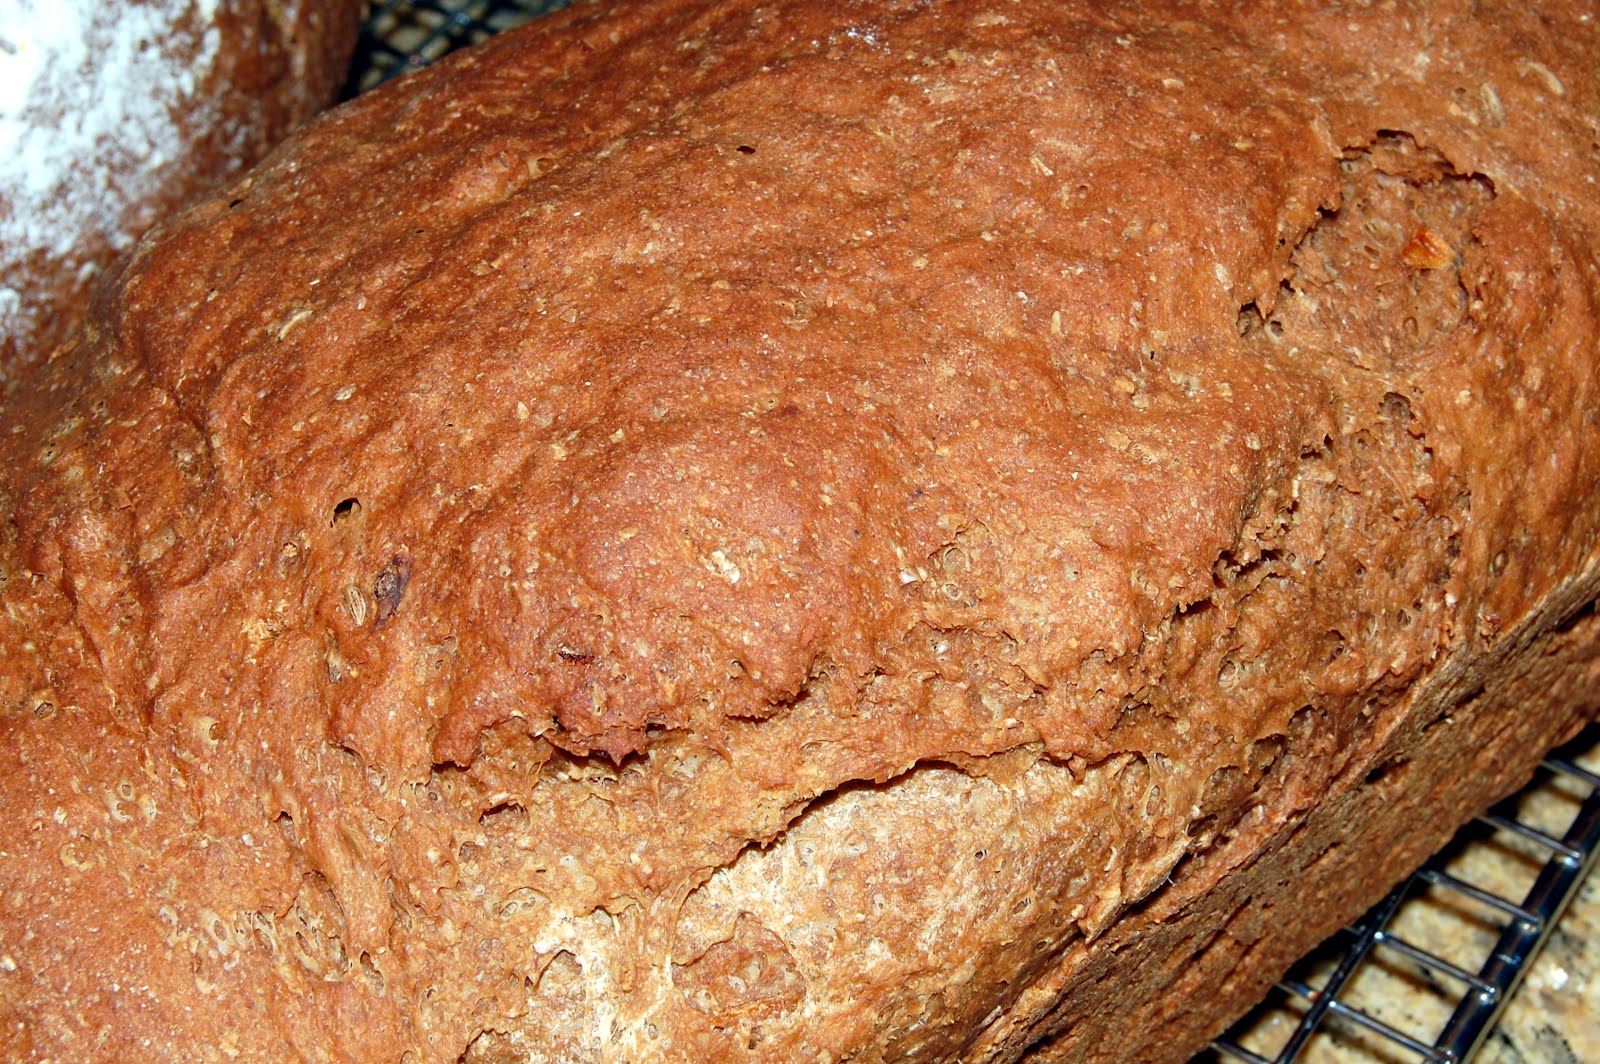
The dried cranberries and chopped pecans seemed to have an antisocial personality disorder. They did not want to mix. (If you make this bread, I recommend that you spend more time than I did poking cranberries back into the dough--the berries on the outside of the bread were burned and inedible, while the berries that had been forced inside were tart-sweet and delicious.
Into an oiled bowl and back into the proofer it goes. This time the proofer goes up to 80. When I thought about it, I realized that my kitchen is almost never 80 degrees. (I do have a proofing setting in my oven, but it's 85 degrees, which is the high end of ideal temperatures for proofing).
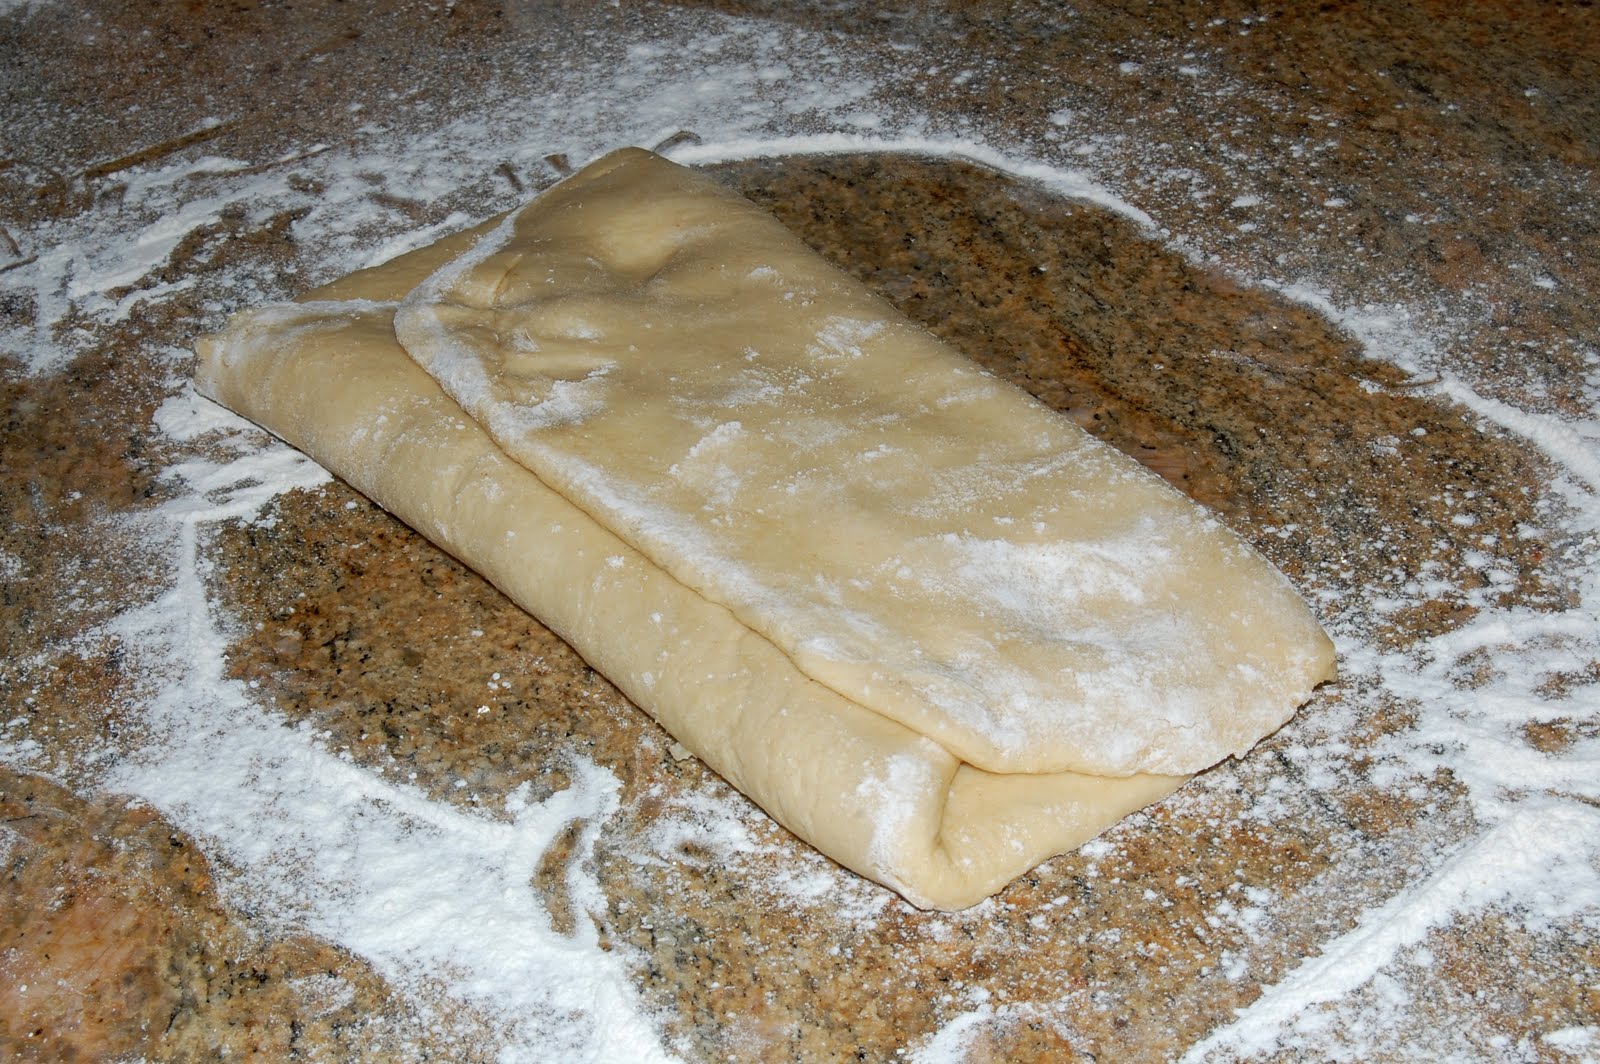
After this proofing, the dough gets shaped into a ball, and put in a bowl or colander. I used a lightly floured banneton. Then it rises again - at 80 degrees exactly - for another hour.
After 25 minutes in the oven. You can see how black the cranberries got. But it's still a handsome loaf of bread. And delicious, too.
But wait, there's more! This little machine is not only a proofer, it also makes yogurt and melts and tempers chocolate. Or so it says. I may very well try it for yogurt, but I'm not sure I'd drag it out to melt chocolate. Although, in fairness, "dragging it out" is not a big ordeal. It folds into a small rectangle, so it doesn't take much space, and it's easy to put together. This gadget definitely belongs in the "luxury" category, not the "essentials." But I'm tickled to have it, and wouldn't be surprised if it turned out to be something I convince myself I could no longer do without. Especially in winter, when dough sometimes is as reluctant to rise as I am to go outside.
Cranberry Pecan Boule
Poolish Starter:
3/4 cup (4.4 oz.) unbleached bread flour
1/2 cup water (4.4 oz.) (70 to 78 degrees)
1/4 tsp instant yeast
Set the proofer to 74 degrees and add 1/4 cup of water to the wawter tray. Mix all the ingredients for the poolish into a large mixing bowl. Place the bowl into the proofer for 4 hours until it inflates into a bubbly, soft, and sweet-smelling sponge.
Dough Ingredients:
All of poolish starter
1 cup (8.1 oz.) water
1 tsp. instant yeast
2 1/4 cups (10 oz.) unbleached bread flour
3/4 cup (3.6 oz) whole wheat flour
2 tsp. salt
1/2 cup dried cranberriese
1/2 cup toasted pecans, coarsely chopped
1. Increase proofer temperature to 80 degrees.
2. Add the water to the poolish and stir it around to loosen it up. Add the yeast, flours,and salt. Stir until a rough dough forms. Knead dough on counter or in stand mixer, using the dough hook, until a smooth and elastic dough forms.
3. Add the cranberries and pecans and work them into the dough until they are evenly distributed throughout.
4. Place the dough into a lightly oiled bowl and place in proofer. Let the dough rise for 60-90 minutes or until it has doubled in bulk.
5. Turn the dough out onto a lightly floured counter and shape the dough into a tight round ball.
6. Place the dough ball seam side up into a well-floured dough rising basket or a bowl/colander lined with a heavily floured linen cloth. Dust the exposed bottom of the loaf with flour and place back inproofer, still set at 80 degrees. Let the dough rise 1 hour or until it has almost doubled inj bulk.
7. Prepare the oven for baking an hour before you are ready to bake. Place a bakingh stone in the middle of the oven with a skillet or rimmed baking sheet on the bottom rack. Preheat to 500.
8. Turn the dough out onto a baking peel or inverted baking sheet lined with parchment. Score the top of the loaf and quickly place the loaf onto the hot baking stone. Add 1/2 cup of water to the skillet and close the door. Bake for 5 minutes, then lower the oven temperature to 450, and continue to bake foro 25-30 minutes or until the loaf is a deep brown color and sounds hollow when tapped on the bottom.
9. Allow the loaf to cool completely before slicing.
From Brød &Taylor Folding Proofer Supplemental Manual, crediting Melissa Langenback, thebakersguide.com.
Monday, January 09, 2012
Cream Cheese Cinnamon Buns
This is the 15th year we've invited people in our neighborhood to casual coffee-and-doughnut hours on Saturday mornings in January. We have pots of coffee, juices for the little ones, and platters of doughnuts. I usually make something homemade in addition to the doughnuts, and last Saturday it was these cinnamon rolls, courtesy of King Arthur's web site.
The cream cheese isn't added to the dough, and it's not in the frosting. Instead, it's layered on the rolled-out dough (letting it soften at room temperature for at least two hours is an excellent idea).
Then it's folded, business-letter style, and rolled out again. This process is repeated again until the cream cheese is more or less absorbed into the dough. (I thought it could have used another turn because I could still see a layer of cream cheese, but I was afraid it would toughen the dough).
Here comes the filling. Either something called Baker's Cinnamon Filling, which King Arthur will be happy to sell you, or your own mixture of butter, brown sugar, and cinnamon. (The Baker's Cinnamon Filling has shortening instead of butter). I used butter. Finally, sprinkle both chopped walnuts AND pecans over the filling, and roll 'er up.
The recipe is supposed to make nine rolls, which you place in a 9" x 9" baking dish. I put nine in an 8" x 10" pan, which, if my math skills are at all accurate, is almost exactly the same area. I don't think it gave them enough room to expand properly because they looked a little squinched when they came out of the oven.
I still had three left over, and I put those in a little round casserole.
A basic powdered sugar/milk glaze is not really very exciting, but it added just the right touch of sweetness. Despite all the brown sugar in the filling, the rolls were not very sweet, and needed just a touch of the frosting that can sometimes be cloyingly sweet. Just a drizzle is enough.
The rolls were still just the slightest bit doughy in the middle, meaning they should have either had more room to spread or I could have baked them just two minutes more. The most heavenly part about these rolls is the crusty corners, which are flaky and tender at the same time. With the nuts, extravagant amounts of butter and cream cheese, and brown sugar, these are like the best parts of both sticky buns and cinnamon buns, rolled (literally) into one delicious treat. And the nice thing is that you can make them at night and simply take them out of the refrigerator, let them warm up a bit, and bake them in the morning. When guests open your front door, they'll be hit with the welcoming scent of cinnamon rolls. They'll be your slaves.
Sunday, January 01, 2012
Rustic Dinner Rolls - and a New Year's Eve Dinner
I've started watching America's Test Kitchen, and I'm fascinated by its best-recipe, try-it-again approach to cooking. It's fascinating to me because it's the opposite of the way I cook. Once I finish a recipe, I don't think about how to make it better; I think about what I'm going to try next. This is pretty obviously not the superior method since it means I never perfect anything. But I do get a lot of variety.
Because I was assigned the salad course (more on that later) for our annual progressive New Year's Eve party, I wanted to make a bread or roll that would be a good accompaniment. I'd seen one of the cooks on ATK work her little heart out on these rolls, so I figured they'd be just the thing. I also liked that they were made with a wet dough that, unlike Norm's Onion Rolls, would not burn out the motor of my new KitchenAid.
The rolls, titled Rustic Dinner Rolls, are pretty straightforward, although they do have some typical ATK quirks, born of their obsessive testing and re-testing.
For example: 3 tablespoons of whole wheat flour, no more no less. This is supposedly just the right amount to get a "nice earthiness." If I were an obsessive tester myself, I'd try again with no WW flour and once again with a half-cup. They had a good flavor, though, so maybe there's no point to further experimentation.
The biggest quirk of this roll recipe is starting them out in round cake pans, so they grow together in their first ten minutes of baking.
Then, lightly browned, they come out of the oven and get turned over on a baking sheet, until they're cook enough to be separated. This initial baking is done at 500 degrees, to increase the amount of oven spring. Then another 10-15 minutes at 400 degrees.
To my surprise, because of the trust I place in ATK, mine didn't spring very high. They actually look a lot like the photo that shows what happenes to a roll when you don't give it that burst of intense heat: they're flat and hockey-pucky, not tall and springy. In ATK's defense, I think this may have happened because I ran out of bread flour after measuring out about a third of the flour. (How does it happen that a bread blogger runs out of bread flour?)
Because these rolls were almost perfect, I'll admit that I'd kind of like to try them again, using all bread flour this time. But I already have a full list of breads to try for the first time, so I don't know when, if ever, I'll return to the rustic dinner rolls made with three tablespoons of whole wheat flour.
Some readers, who have been reading this blog for years (people, don't you have anything better to do with your time?), may remember that our New Year's Eve tradition is to have a neighborhood progressive dinner. When Jim remembers, he photographs the courses. I think he's only remembered once.
This dinner started out at the Niemiecs' house for appetizers. Appetizers are my downfall (I probably should say one if my many downfalls). I love having a little savory bite, or, let's face it, a lot of largish savory bites. Joan made a platter of crisp vegetables,
smoked salmon with onions and capers,
and spinach balls.
Then we moved to the soup house, which belongs to the Beiers. Master soup-maker Betty B. made leek and mushroom soup topped with brie toasts.
The third course was at our house. In addition to the rustic rolls, I made a fennel, watercress, and blood orange salad with champagne vinaigrette.
The piece-de-resistance was Beef Wellington, by Laurel Deloria, who has never found a recipe she's afraid to tackle.
She was also not afraid to tackle a Madeira sauce (delicious).
The Papanicolaous thoughtfully provided bowls of beautiful vegetables, so that we could delude ourselves into thinking we were eating healthily. (There was also an unpictured bowl of green beans).
Jim got a new timer for his camera so that he could take a picture of the whole group, including himself. However, he neglected to read the directions, and he never did get it to work, so he finally gave up and took a picture of everyone but Jim.
Unfortunately, he was so flummoxed by this photography failure that he completely forgot to take a picture of the dessert prepared by Doug Logeland: lemon tart with chocolate crust. Too bad, because it was a memorable finale to a great dinner.
And a happy new year to you all!
Subscribe to:
Posts (Atom)