Monday, January 09, 2012
Cream Cheese Cinnamon Buns
This is the 15th year we've invited people in our neighborhood to casual coffee-and-doughnut hours on Saturday mornings in January. We have pots of coffee, juices for the little ones, and platters of doughnuts. I usually make something homemade in addition to the doughnuts, and last Saturday it was these cinnamon rolls, courtesy of King Arthur's web site.
The cream cheese isn't added to the dough, and it's not in the frosting. Instead, it's layered on the rolled-out dough (letting it soften at room temperature for at least two hours is an excellent idea).
Then it's folded, business-letter style, and rolled out again. This process is repeated again until the cream cheese is more or less absorbed into the dough. (I thought it could have used another turn because I could still see a layer of cream cheese, but I was afraid it would toughen the dough).
Here comes the filling. Either something called Baker's Cinnamon Filling, which King Arthur will be happy to sell you, or your own mixture of butter, brown sugar, and cinnamon. (The Baker's Cinnamon Filling has shortening instead of butter). I used butter. Finally, sprinkle both chopped walnuts AND pecans over the filling, and roll 'er up.
The recipe is supposed to make nine rolls, which you place in a 9" x 9" baking dish. I put nine in an 8" x 10" pan, which, if my math skills are at all accurate, is almost exactly the same area. I don't think it gave them enough room to expand properly because they looked a little squinched when they came out of the oven.
I still had three left over, and I put those in a little round casserole.
A basic powdered sugar/milk glaze is not really very exciting, but it added just the right touch of sweetness. Despite all the brown sugar in the filling, the rolls were not very sweet, and needed just a touch of the frosting that can sometimes be cloyingly sweet. Just a drizzle is enough.
The rolls were still just the slightest bit doughy in the middle, meaning they should have either had more room to spread or I could have baked them just two minutes more. The most heavenly part about these rolls is the crusty corners, which are flaky and tender at the same time. With the nuts, extravagant amounts of butter and cream cheese, and brown sugar, these are like the best parts of both sticky buns and cinnamon buns, rolled (literally) into one delicious treat. And the nice thing is that you can make them at night and simply take them out of the refrigerator, let them warm up a bit, and bake them in the morning. When guests open your front door, they'll be hit with the welcoming scent of cinnamon rolls. They'll be your slaves.
Sunday, January 01, 2012
Rustic Dinner Rolls - and a New Year's Eve Dinner
I've started watching America's Test Kitchen, and I'm fascinated by its best-recipe, try-it-again approach to cooking. It's fascinating to me because it's the opposite of the way I cook. Once I finish a recipe, I don't think about how to make it better; I think about what I'm going to try next. This is pretty obviously not the superior method since it means I never perfect anything. But I do get a lot of variety.
Because I was assigned the salad course (more on that later) for our annual progressive New Year's Eve party, I wanted to make a bread or roll that would be a good accompaniment. I'd seen one of the cooks on ATK work her little heart out on these rolls, so I figured they'd be just the thing. I also liked that they were made with a wet dough that, unlike Norm's Onion Rolls, would not burn out the motor of my new KitchenAid.
The rolls, titled Rustic Dinner Rolls, are pretty straightforward, although they do have some typical ATK quirks, born of their obsessive testing and re-testing.
For example: 3 tablespoons of whole wheat flour, no more no less. This is supposedly just the right amount to get a "nice earthiness." If I were an obsessive tester myself, I'd try again with no WW flour and once again with a half-cup. They had a good flavor, though, so maybe there's no point to further experimentation.
The biggest quirk of this roll recipe is starting them out in round cake pans, so they grow together in their first ten minutes of baking.
Then, lightly browned, they come out of the oven and get turned over on a baking sheet, until they're cook enough to be separated. This initial baking is done at 500 degrees, to increase the amount of oven spring. Then another 10-15 minutes at 400 degrees.
To my surprise, because of the trust I place in ATK, mine didn't spring very high. They actually look a lot like the photo that shows what happenes to a roll when you don't give it that burst of intense heat: they're flat and hockey-pucky, not tall and springy. In ATK's defense, I think this may have happened because I ran out of bread flour after measuring out about a third of the flour. (How does it happen that a bread blogger runs out of bread flour?)
Because these rolls were almost perfect, I'll admit that I'd kind of like to try them again, using all bread flour this time. But I already have a full list of breads to try for the first time, so I don't know when, if ever, I'll return to the rustic dinner rolls made with three tablespoons of whole wheat flour.
Some readers, who have been reading this blog for years (people, don't you have anything better to do with your time?), may remember that our New Year's Eve tradition is to have a neighborhood progressive dinner. When Jim remembers, he photographs the courses. I think he's only remembered once.
This dinner started out at the Niemiecs' house for appetizers. Appetizers are my downfall (I probably should say one if my many downfalls). I love having a little savory bite, or, let's face it, a lot of largish savory bites. Joan made a platter of crisp vegetables,
smoked salmon with onions and capers,
and spinach balls.
Then we moved to the soup house, which belongs to the Beiers. Master soup-maker Betty B. made leek and mushroom soup topped with brie toasts.
The third course was at our house. In addition to the rustic rolls, I made a fennel, watercress, and blood orange salad with champagne vinaigrette.
The piece-de-resistance was Beef Wellington, by Laurel Deloria, who has never found a recipe she's afraid to tackle.
She was also not afraid to tackle a Madeira sauce (delicious).
The Papanicolaous thoughtfully provided bowls of beautiful vegetables, so that we could delude ourselves into thinking we were eating healthily. (There was also an unpictured bowl of green beans).
Jim got a new timer for his camera so that he could take a picture of the whole group, including himself. However, he neglected to read the directions, and he never did get it to work, so he finally gave up and took a picture of everyone but Jim.
Unfortunately, he was so flummoxed by this photography failure that he completely forgot to take a picture of the dessert prepared by Doug Logeland: lemon tart with chocolate crust. Too bad, because it was a memorable finale to a great dinner.
And a happy new year to you all!
Monday, December 05, 2011
Norm's Onion Rolls
My friend and (sometime) fellow blogger, Chris from Rhode Island, recently asked me if I knew about The Fresh Loaf.
Well, in fact, I do know about it, but Chris's note reminded me that I hadn't visited the site for many months. So visit it I did, and came away with this recipe for Norm's Onion Rolls.
People on The Fresh Loaf raved about Norm's Onion Rolls. And I'm going to rave about them too, but I will say that Norm could write clearer recipes. And if I were a good and responsible blogger, I would make these several more times, and I would edit the recipe until it was understandable. But I'm not good and responsible, so I will link to the recipe as is, and if you make them, you'll probably have the same questions I did, but since mine came out just fine, I'll bet yours will too.
This makes a very thick dough. In fact, my trusty KitchenAid stopped dead in its tracks. I quickly turned it off, hoping that it would recover. I haven't re-tested it yet.
Oh, this is bad. After I wrote that sentence, I decided I couldn't keep myself in the dark about whether I had a working stand mixer. So I went to my kitchen to try it out. It's not working well. Now I've put Jim in charge of seeing if he can use his duct tape method of repair to fix it right up. Otherwise I might have to tell him that he'll be getting a new Kitchenaid for Christmas. (I already have my presents picked out, so I'm afraid it will have to go on his list. That's what happens when you're slow to make your list).
But before you get to the dough-rising stage, you have made the onion mixture. Oddly, you don't want to use real onions. Instead, you buy a jar of dehydrated onions, which you would probably normally not consider using in real food. At least this is what Norm recommends, and so it's what I did. You soak the dried onions for a while, then drain them, reserving the onion-soaking water for the bread dough.
Then you divide the dough into 3-oz. or 4-oz. balls, depending on how big you want your rolls. Mine were in the neighborhood of 4 ounces, and I got 13 rolls. At this point, the recipe got a little unclear. You make mini boules, and, at some point, you let the dough rest again. I couldn't tell whether Norm wanted me to let the dough rest before shaping it into boules, or after, or at what point he thought I should cover the dough with the onion-poppy seed mixture. I shaped them first and let them rest for 20 minutes or so.
Also, the recipe says to use your thumb to make a dimple on top of the rolls. I thought that meant I should put the filling inside the dimple. But I think I was supposed to flatten the dough while pressing the roll into the onion mixture and then make the dimple. I now believe that the dimple actually has no utilitarian value (such as serving as a nest for the onions)--it's just the way it is. But I could be wrong. Perhaps if someone who is familiar with these New York-style rolls reads this, they can give me some advice, preferably not beginning with, "Breadbasketcase, don't you know how to read?"
This is what they looked like going into the oven:
And this is what they looked like coming out:
These are not ladylike rolls. Even if you made them smaller, there's something very hefty and satisfying about them. If I had flattened them more, and pressed the onion mixture into the top of them, they would have been perfect for sandwiches. But as long as I didn't wonder how they compared to Norm's rolls, which have reached a nearly mythic stature among readers of The Fresh Loaf, I liked them exactly as they were--round, savory, and toothsome.
Sunday, October 16, 2011
Grape Focaccia
Time sure flies when you're not baking bread. I could not believe the last date on a blog entry--it couldn't possibly have been nearly two months since I made the Pan Cubano! And this bread had been on my radar ever since I saw the recipe in the New York Times on September 28, 2011. I picked some wild grapes in anticipation of baking this focaccia from a friend's vacation house, but they withered away in the refrigerator. Then I picked some Concord grapes from the same neighbor's city yard, and they too wrinkled and dried. Finally, I bought some red grapes from the grocery and made the bread the same day.
Really, there's no excuse not to. You're likely to have almost everything you need on hand: olive oil, yeast, flour, cornmeal, and sugar. You may, if you're lucky, have pine nuts in your freezer and fresh rosemary in your herb garden. If not, pick them up when you buy your grapes (or snitch your neighbor's grapes, if you're more organized than I am and you pilfer them at the appropriate time).
First, you gently heat some fresh rosemary in 72 grams (about 6 tablespoons) of olive oil. If you absolutely have to, you could use dried rosemary, but it won't be the same.
Then you simply mix everything but the toppings in a mixing bowl and knead for about five minutes, using the dough hook. Feel free to knead by hand if it makes you happy, but it's easier to knead this wet dough with a hook. You can take it out of the bowl and do the last minute or so of kneading by hand, making sure that you don't add too much flour.
Let it double in size. If you use all the yeast (two teaspoons) and let it rise in a warm place, it takes only about an hour. You can decrease the yeast and let it rise longer, or even let it rise twice. You'll get more flavor from the dough with less yeast and longer rising times, but it doesn't matter much in this focaccia, which has a lot of strong flavors--not just the grapes and rosemary, but also the cornmeal and sugar add different elements not usually in a flatbread.
Shape into a rectangle. No need to measure--this is supposed to be rustic.
And make sure you've dimpled the dough! Don't actually make holes in the dough--you don't want to break the bottom layer. Then scatter on the grapes, pine nuts, the reserved rosemary, a little sugar (I used turbinado), and sea salt. Then drizzle with olive oil (don't be chintzy with the oil), and bake on a parchment-lined pan. Hopefully you've remembered to put a baking stone in the oven and to preheat the oven to 400.
This bread didn't match Rose's rosemary focaccia, the gold standard of focaccia-ness. It was quicker and easier, though, and had a nice sweet/savory balance. The cornmeal was a good addition, and the big grains of sugar and salt made a fascinating mouth crunch, giving out big hits of sweet and salty in the same bite. I started making the bread at 3:15, and took it out of the oven at 5:20, just minutes before people started arriving for a Friday afternoon TGIF gathering. Cheetos and beer for one half of the block; wine and grape focaccia for the other. Who says we can't all get along?
Tuesday, August 23, 2011
Pan Cubano (Cuban Bread)
Although I definitely haven't committed to making bread from every country in the world (in fact, every time I think of it, it seems to be a crazier idea). But I've noticed that ever since my friend David suggested this as a project, I've been drawn to any recipe with pan, pane, brood, pain, or brot in it. Luckily, I don't know how to recognize the word for "bread" in Russian, Arabic, or a host of other languages, so I haven't gone crazy. So far.
There are a couple of things about this bread that are unique, at least to me. First, it's made with lard, instead of butter or oil. The word on the label is actually "lard," not "ard." I checked all the dozen or so containers of lard to look for one that didn't say "ard," but I searched in vain. Apparently Clancey's printer doesn't do ls.
When I read the recipe for Cuban bread more closely, I saw that the recipe is actually for pan de manteca (lard bread) instead of pan de agua (water bread). Apparently pan de agua is more commonly sold in bakeries, but since I'd already bought the manteca, I was certainly going to use it.
Most of the 4 tablespoons of melted lard is mixed in the dough, but a bit is put on the top of the dough when it's put in a bowl to rise.
It's an enthusiastic riser, and takes only about an hour for it to double in size. Its second rise, done after it's shaped into loaves, is only 5 to 7 minutes--really a rest rather than a rise.
Unlike a ciabatta with poolish, say, this bread has no pre-ferment and short rising times, which makes it a good recipe to know about when you have a mid-afternoon urge to make bread and you want it for dinner.
Another thing that makes this bread unique is its decoration with bay leaves, tucked in the slashes. If you don't have bay leaves, you don't have to run out and buy a jar--they're not essential to the success of the bread. But if you have them, you might as well use them, especially if you suspect that they've been lolling around on your spice rack for years and it's probably time to replace them with leaves that smell like bay.
But the most unique thing about this recipe by far is that it starts in a cold, but steamy, oven. That's right--no preheating. Just a pan full of boiling water. For some reason, starting the bread in a cold oven makes it so steamy that the door is covered with condensation and you can't see in the oven. I'd love to know why the Cubans, unlike everyone else in the history of bread, decided to start theirs in a cold oven. Maybe this is just an eccentric recipe, but I'd rather think that there's a good story behind this method.
At some point in the afternoon, it occurred to me that if I had two loaves of Cuban bread, I should use at least one of them to make Cuban sandwiches. I sliced part of a loaf in half (sans the bay leaves), spread mustard on each half, and layered ham, roast pork, baby Swiss, and sliced dill pickles on the bottom half.
I was going to use my almost-never-used panini maker, but I read someplace that a true Cuban sandwich should never be made in a panini maker, so I put it on a griddle and weighed it down with a heavy pan. Then I put another heavy pan on top of the first one. Then I put my tea kettle on top of the second heavy pan. Definitely not authentic, but it worked, although I don't understand why the panini maker is verboten.
This sandwich was so good, and so easy to make--assuming you have all the necessary ingredients, it goes together in no time. It's an odd combination of ingredients, but it works. I like to picture the same Cuban grandmothers who decided to bake bread in a cold, steamy oven, also standing around arguing about what to put on the bread. I think that they couldn't agree, so they each just shouted out their favorite food: Mustard! Pork! Cheese! Then they stuffed it in their just-baked bread, heated it up, and ate it. They were in hog heaven. Or, as they say in Cuba (maybe), paraĆso de los cerdos.
Sunday, August 14, 2011
Ciabatta with Poolish
I made another version of ciabatta about two years ago, when I made a very similar recipe from the same book: Bread, by Jeffrey Hamelman. Two years ago, I reported this conversation:
Jim looked at the cookbook and asked me if I was making ciabatta with poolish. "No," I said, "I'm making the one with the biga." "What's the difference between biga and poolish?" he asked. "Ummm," I said, "well, you know." "No, I don't," he said. I didn't want to admit I really didn't know the difference myself. I searched my memory. "Well, you ferment them ahead of time and add them to the dough. And poolish means Polish. I think." I finally looked it up, and there's not a huge difference, except that a biga is a more generic term for a pre-ferment and can be soft or stiff in texture, and can be refrigerated up to three days, whereas a poolish is never refrigerated.So this time I made ciabatta with the non-refrigerated, soft poolish. It was very good. But I see that I reported that the ciabatta made with stiff biga was also very good. This made me realize why I'm not a true baker: I'm not scientific. I don't keep at a recipe until I've perfected it. I'm haphazard. I make ciabatta when I feel like it, which seems to be about every six months, judging by a search for "ciabatta" on my blog. On the other hand, I get to make ciabatta when I feel like it.
Please don't be intimidated by the foreign, exotic-sounding poolish, or by the make-ahead nature of it. The poolish could not be easier to make: you mix up water, flour, and a smidgen of yeast with a wooden spoon. Then you cover it with plastic wrap and go to bed. (You actually don't have to go to bed. You just have to leave the poolish alone for 12 to 16 hours, so if you are younger than I am and have more entertaining things to do with your time on Saturday night, feel free. I went to bed). When you get up (or get home, if you've had an exciting time of it), the poolish is bubbly and ready to go.
And don't be intimidated by the rest of the bread dough; that's simple too. It's just mixing the poolish into more bread flour, water, and yeast. If you want to be intimidated by something, you can worry about working with the outcome of the easy mixing: a very wet, very sticky dough, that is, according to Hamelman, so delicate that it might collapse if you sneeze. Now those are words to intimidate.
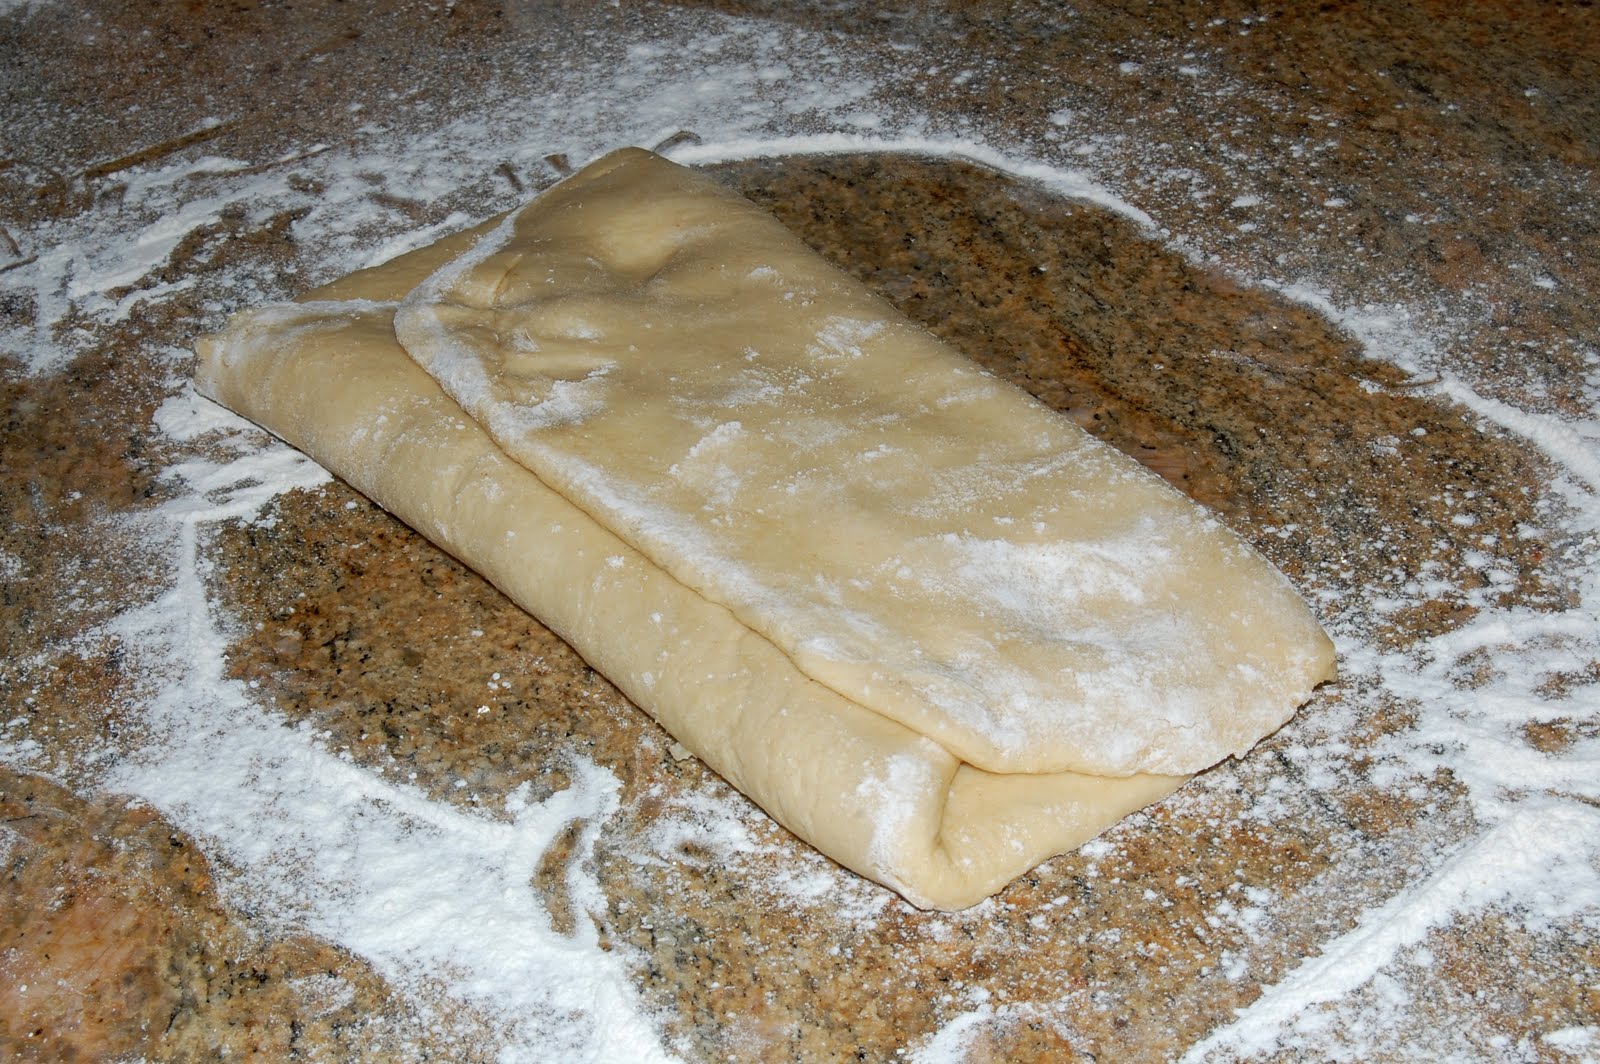
And you get plenty of opportunity to handle it. The first rise is about three hours, but you're supposed to take it out of its bowl, watching it slowly and silently plop onto the counter, and fold it into thirds, then carefully put it back in the container.
Next in the process--shape it into the typical oblong, flour-coated ciabatta loaves. The home version of the recipe makes three loaves. I cut the recipe in half, but made two smallish loaves. I should have made 2/3 of the recipe, but dividing by 3 is harder than dividing by 2, which was already taxing my limited math abilities.
What with the stickiness of the dough and the dire warnings about collapsing, I'm always surprised that the dough manages to shape itself into loaves that more or less look how they're supposed to look. It helps that they're supposed to look kind of rough-hewn.
If you want a super-crispy crust, you can do some kind of steam contraption. Depending on my mood, I toss ice cubes on a preheated cookie sheet, pour boiling water in a preheated cookie sheet, or use my steamer. I always use a baking stone when making a rustic kind of bread. Even if you don't want to do those things, though, I think the bread would still taste better than almost anything that you can buy, which is good because it goes stale very quickly.
Here is the recipe. As I mentioned, I divided it in half and got two rather small loaves. If you make the whole recipe, I recommend either giving some away or freezing at least one loaf because it just won't be as good the second day:
Ciabatta with Poolish
from Bread, by Jeffrey Hamelman
POOLISH
9.6 oz. (2 1/4 cups) bread flour
9.6 oz. (1 1/4 cup) water
1/8 tsp. instant dry yeast
DOUGH
1 lb. 6.4 oz. (5 1/8 cups) bread flour
13.8 oz. (1 3/4 cups) water
.6 oz. (1 T.) salt
.13 oz. (1 1/4 tsp)instant dry yeast
1. POOLISH. Disperse the yeast in the water,, add the flour, and mix until smooth. Cover the bowl with plastic and let stand for 12 to 16 hours at room temperature.
2. MIXING. Add all the ingredients to the mixing bowl, including the poolish. In a stand mixer using a dough hook, mix on low speed for 3 minutes. Finish mixing on medium for 3 1/2 to 4 minutes, until gluten development is evidence. The dough will still be loose and sticky, but should have some "muscle".
3. FERMENTATION AND FOLDING. Put the dough in a mixing bowl sprayed with baker's spray. Fold the dough twice, after one hour and again after two hours.
4. DIVIDING AND SHAPING. Flour the work surface copiously. Invert the dough onto the work surface and pat out the larger air bubbles. Lightly flour the top surface of the dough. Cut the dough into 3 rectangles, weighing about 18 ounces each. Gently shape into rectangles. Place the dough piece onto floured bread boards (I used floured parchment paper). Cover the shaped dough with baker's linen and then plastic.
5. FINAL FERMENTATION. About 1 1/2 hours.
6. BAKING: Preheat oven to 460 degrees.
To transfer the proofed dough to a baker's peel, spread the fingers of both your hands. With a quick, deft stroke, invert the dough piece so that the side that was touching the bread board is now on top. Place one hand at each end of the dough piece, bring your fingers underneath, and pick it up. Here you will slightly punch the dough for easier transport; there should be wrinkles in the center of the loaf as the transfer it to the peel. [I just picked up the parchment paper and put it on top of a pre-heated baking stone--I'm using his instructions here just to show why I think they're hard to understand.) Fill the oven with steam, load the ciabattas, steam again, and bake for 34-38 minutes. (I used the steam machine; otherwise you can use either an ice cube or boiling water method to get steam. Hamelmans thinks you should use all three: ice cubes on a heated skillet before the bread goes in, boiling water on a heated pan when the bread goes in, and spritzing with water too). Lower the oven temperature by 10 or 20 degrees if bread is taking on too much color, but be sure not to underbake.
Remove the bread from the oven and let cool on a baking rack.
Subscribe to:
Posts (Atom)